Showing posts with label flowers. Show all posts

Friday, May 16, 2014

An Update and a Peek at my Process

Hello All!
It's been a loooooong time since I updated my blog because I have been keeping really busy! I have been working on two sets of wedding invitations, one of which is done, the other is about half way done. I am starting to design yet another set, and working on some commissions and some personal projects. I also am still doing some graphic design work for a home linens company. So I've been keeping super busy!
That being said, I thought it was about time I did another post about my process. This fall, I had a commission to paint a piece as a wedding gift. It took a lot longer than I thought it would, but I was really happy with the result!

First, I started with the reference the client gave me for the project. They had already been to the wedding, so they had taken pictures of the bouquets for me.
The reference. There wasn't much to go off of, but I did at least have an idea for color
From there, I made some REALLY rough sketches to send to the client. I knew the client very well, so I knew she'd be able to work from these. I also offered to send her clearer sketches, but she got a pretty good idea of what I wanted to do. From these rough sketches, I did a final sketch, then transferred it to watercolor paper to paint! I love my lightbox, it has made my life so much easier. (And the best part? It was a garage sale find!)

Before I start painting, I always do a rough color composition in photoshop to give myself a general map for the painting:
As you can see, I just put the general colors in, outlining two of the flowers at the top and giving them shadows so I know that the direction I want to take the painting in will work
Then it's time to start the painting!
I have all my paints ready, my brushes, and the painting taped onto my drafting table. I also work with my sketch next to me so I know where the shadows and hi-lights need to go. The color comp I leave up on my computer screen to follow.
I paint these like a paint by number. (Did any one else love these as a kid?) First I painted the light grey background. Then, I mix the shadow, base color, and hi-light for a flower. (I typically use gouache to paint all my pieces). Then I start with all the hi-lights of a certain color, than the midtone, then finish with the shadows. After I have done this for all the flowers, I do the white outlines:
As you can see, I paint it color by color until all my guidelines are filled in! It's a very exact way of painting, but it works really well for me. It's also really fun to see the painting come together piece by piece!
The finished painting with the original sketch. Time to take the tape off!
Here is the finished piece:
I loved painting this piece because the colors were so fun! The client was happy, and I believe the bride was too!
If you would like to commission a piece for a wedding, contact me via my etsy store or at anne@anneappert.com.

Also, a reminder that you can now follow me on facebook and on instagram! (anneappertillustration)

Now, back to work on everything else I have to do!

Monday, November 18, 2013

Another Wedding Project

This is another belated post, but while I am working on my calendar, I thought I would get you ready for more flowers. Also, since this project was a gift and I know the person now has it, I feel comfortable blogging about it.
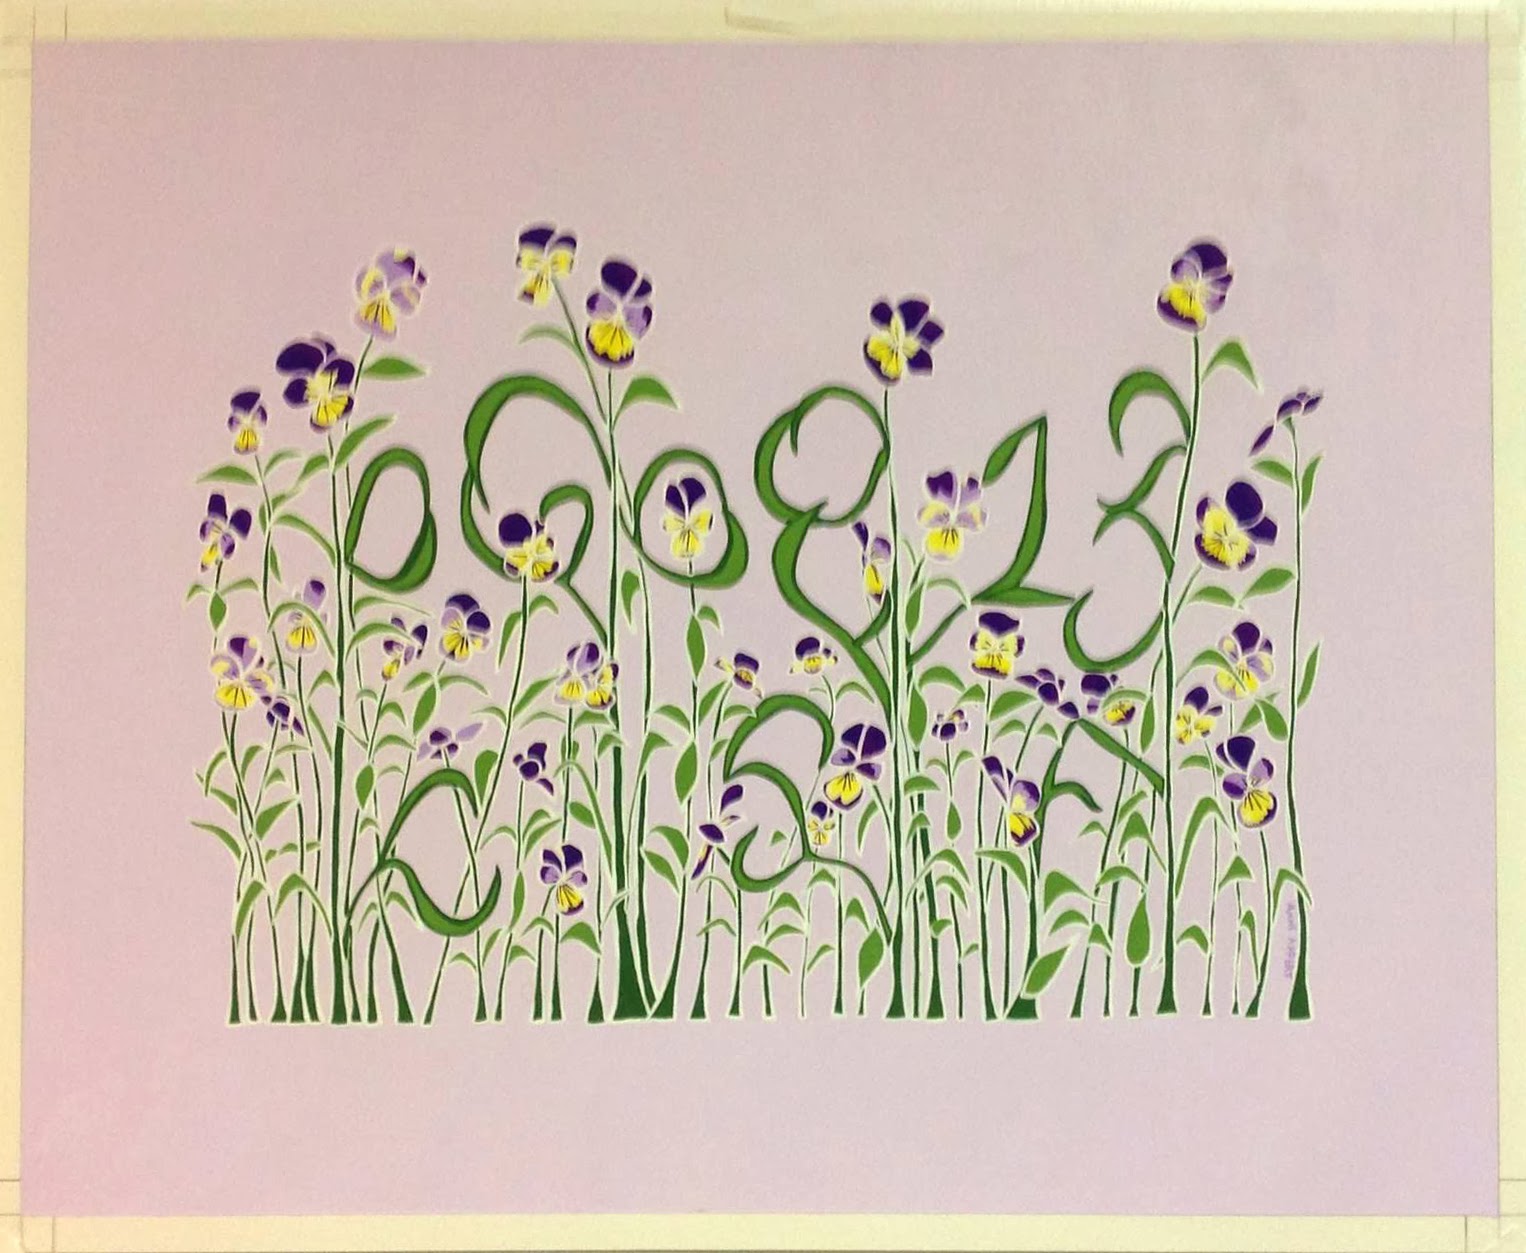
The wedding thing seems to be taking off for me. This summer, I did a project for a friend that also had to do with weddings (on top of all the wedding invitations I made!).  She loved the paintings I did for my 2013 calendar, and asked if I could do a painting for her to give as a wedding present to a friend. Of course I said yes. At first I was just going to do a flower painting for her, but then came up with what I thought was a brilliant idea: I would draw the date of her wedding, with the flowers forming the dates, like a trellis of sorts. My friend loved this idea so I went ahead and sent her some sketches.The bride's favorite flowers are johnny jump ups (or at least this is what I was told) and her bridesmaid dresses were a lovely lilac color, so this formed the basis for the painting.
 This was a much bigger painting then I had done for awhile, so I miscalculated the time it would take me but I was very happy with the result.


The colors!

starting to paint the flowers

it was a slow process

halfway there!

flowers are done!
stems done
numbers and letters done, now just the leaves
now to outline everything

finished! time to take the tape off

the finished painting (the colors are a little bit more accurate in the other pictures.)

The leaves make up their wedding date and their monogram.
Although a pain in the neck at times (and I do mean that literally, I must hold my head in the same position for a long time when I paint),  this was a good project, and another that I hope to put on my etsy store for people to see and order their own versions. (I am currently working on a similar project which I hope to post in the next couple of weeks) I thought this was such a nice way to remember such a beautiful and important day!
And now, back to feverishly painting my calendar!

Tuesday, December 11, 2012

Just a Quick Update...

Hello all.
It's been a long time since I posted anything here so I am not sure anyone who isn't on facebook even reads this anymore.
However, I am writing to say, I'm back!
With Hurricane Sandy I was out of power for a week and a half and then with transportation stress and painting like crazy, I haven't really had time to post.
I have good news though. I have finally opened my etsy store and am selling a 2013 calendar and prints!
click here or on the link to the left of the page to see it.
I was super happy with how these came out, after going through some printing panic. And the pictures aren't so bad themselves. I will update tomorrow with pictures, but for now check it out on etsy.
I personally think it would make a great Christmas present for that impossible person on your list.
Enjoy!

Wednesday, October 17, 2012

October Marigolds

Hey all!
just a quick update before I get back to painting. (I have A LOT of work to do).
Here is the painting for October of my calendar. Marigolds are the flower for October, and we happen to have a lot of lovely marigolds in our yard, so I was able to get lots of great reference. The birthstone for October is opal, which I ran into problems with. Since I have been painting SO graphically, I wasn't sure how to do opal, since it is iridescent. However, after talking to my sister who happens to have an October birthday, she said a lot of people use rose quartz as the birthstone for October. Because opal does have some pink in it, I thought this was a good compromise for the painting.
What do you think?
 Now on to August!

Wednesday, October 3, 2012

March Daffodils

It's been a long time since i posted anything here. I have been in a creative funk for awhile, feeling uninspired, and unmotivated. Finally, I felt the need to do something creative again and was able to get a painting done. Somehow, I need to find a way to push through these funks when they happen so I can still paint. Really, once I start, I remember how much I really do love this, no matter how frustrating or tedious a painting can be.
Anyway, I decided to steal an idea from one of my good friends and do a calendar for 2013. (my friend Paule, you can see her awesome work here) . In many google searches, I found lists in various places of monthly flowers. Similar to birthstones, there is apparently a flower for each month. No site seems to agree on what they are, so I just picked my favorite ones for each month.
Every spring I am a maniac with a camera and take tons of pictures of flowers when they first bloom. Because of this I had some great photographs of daffodils. Therefore, for March, I went with daffodils. The birthstone for March is aquamarine so I went with a blue background for the piece.
Here is an abbreviated overview of my process for this painting.
First I picked the photographs.  I like to use reference when working on a flower painting so I used this photograph combined with another. I played with moving the flowers closer and flipping them around and came up with a composition
  

Then I do a rendered drawing to understand shadows and highlights.
Then I trace the drawing making the shadows and everything into shapes.
From here I do a color comp in photoshop. It's fun because it is kind of like coloring in a coloring book. I usually simplify the shapes at this point of the project. When I am satisfied with the colors, I transfer the drawing to a piece of hot-pressed watercolor paper and start painting.
painting the background first
progress report

And here is the finished product
The scan came out a bit brighter than the actually painting, but I kind of liked it. Daffodils are such bright cheerful flowers it made sense. I realized while painting that my process has become like a paint by number I create for myself. It was a fun realization, and makes me think that those years of doing paint by numbers did not go to waste (just kidding). Sometimes, it does get a little tedious, and I do need to figure out a faster process, but for now, it does work for me so maybe I will just try to get faster.
Enjoy!