Showing posts with label wedding present. Show all posts

Friday, August 8, 2014

A Wedding: Starting the Roadtrip

Hello again!

Yes, I know it's been awhile, but I have so much to write about now, I think I can post more within the next couple months. I just have felt so inspired in the last couple of weeks I am not even sure where to begin! I guess I should start at the beginning of the road trip in California I just did.

Let's start with the wedding I went to 2 weeks ago. (I can't believe it's already been 2 weeks! Time sure does fly when you are having fun!) Two of my closest friends tied the knot on July 26th in San Diego. My sister and I traveled together to the wedding. We got in the day before, but because we had had a CRAZY week before, were so exhausted all we could do was take out our wedding clothes and crash. Of course, because of the time difference, we woke up at 5 a.m. and couldn't get back to sleep. The wedding was at 12:00, so we had a lot of time to get ready!

One of our friends met us at the hotel so that we could get ready together, but we still had so much time to kill. It was the first time I had ever been ready early for a wedding. We made our way to the church and actually managed to get there just in time, even though we were ready early. (It took us some time to figure out the gps).

The wedding was beautiful. The bride looked gorgeous, and the groom didn't look too nervous. It was the first wedding I have been to that I am really good friends with both bride and groom, and it was so exciting. I am so happy for them!

The reception was at a vineyard nearby, and it was lovely. I didn't take many pictures because the camera just couldn't capture the prettiness of the interior. You really needed to see it all at once. The dinner was delicious, the toasts were heartfelt with just the right amount of humor and tears, and the dancing was so fun! We didn't know many people there, but we still had a blast.
My sister and I with the bride and groom
We were also huge fans of this orange tree outside the vineyard.

All in all it was one of the most fun weddings I have ever been to.

Wait, you say, where is the art?? No worries, I am getting to it!
I was really happy to be able to do the invitations for my friends. They were so easy to work with, and so understanding about timing, etc. I think it helped that my friend Cathie is a graphic designer, so she knew a lot about how this kind of stuff works.
When I started designing, I was a little lost for ideas. They were having the reception at a vineyard that looked like a castle, her colors were a wine color and hydrangea blue, but they didn't want anything too flowery. I didn't want it to be corny, which I though trying to do a castle idea might become. Then I got the idea to do a vine, like a grapevine, but instead of having grapes, I would do polka dots in a more graphic design kind of way.
I was really happy with the result:
The final invite...or so I thought
Then came printing. I took them to the printer I usually use, and...the color was NOT right. Not even close. I panicked. This had never happened to me in all the times I had used this printer. They were so helpful and let me sit at their computer for an hour trying to fix the colors, but the printer was calibrated incorrectly, so everything I did came out too yellow, too grey, too purple. I couldn't figure it out. I called the bride with dread to tell her we were going to have to change the design, and she was super ok with it! I was so afraid she would freak out (and she would have had every right to), but she was so calm and understanding, and even offered some suggestions (The benefit of designing for someone who has dealt with this stuff before!).
So I had to change the color. It still took me about half an hour at the printer to make it right, but this time I was able to get it close. 
The full invitation

The main card

the rsvp. It was a postcard. They came up with the wording and I loved it!
The other cards
Honestly, once I had glued and glittered and assembled all the invitations, I was really very happy with the color change. It made the invitations look much more elegant, and they were so pretty. So I guess all the stressful hours were worth it! The bride and groom were very happy, so I was very happy. 

Unfortunately, I can't use the printer again because I can't do that to a bride and groom again. I love supporting small business, so I am upset I won't be able to use them again, but....I did get a new printer! Now I will be printing invitations myself. I got a printer I can print 5x7 cards on, and a nice paper cutter, so I won't be spending hours and hours again cutting things. It was probably good that this happened, because I needed a new printer anyway, and now I will be producing and monitoring the quality all myself. My next purchase will be a nice camera so I can take better pictures for this blog!

It was really fun to do these invitations, and a really fun wedding!
Be on the lookout for more blog posts about my trip!


Friday, May 16, 2014

An Update and a Peek at my Process

Hello All!
It's been a loooooong time since I updated my blog because I have been keeping really busy! I have been working on two sets of wedding invitations, one of which is done, the other is about half way done. I am starting to design yet another set, and working on some commissions and some personal projects. I also am still doing some graphic design work for a home linens company. So I've been keeping super busy!
That being said, I thought it was about time I did another post about my process. This fall, I had a commission to paint a piece as a wedding gift. It took a lot longer than I thought it would, but I was really happy with the result!

First, I started with the reference the client gave me for the project. They had already been to the wedding, so they had taken pictures of the bouquets for me.
The reference. There wasn't much to go off of, but I did at least have an idea for color
From there, I made some REALLY rough sketches to send to the client. I knew the client very well, so I knew she'd be able to work from these. I also offered to send her clearer sketches, but she got a pretty good idea of what I wanted to do. From these rough sketches, I did a final sketch, then transferred it to watercolor paper to paint! I love my lightbox, it has made my life so much easier. (And the best part? It was a garage sale find!)

Before I start painting, I always do a rough color composition in photoshop to give myself a general map for the painting:
As you can see, I just put the general colors in, outlining two of the flowers at the top and giving them shadows so I know that the direction I want to take the painting in will work
Then it's time to start the painting!
I have all my paints ready, my brushes, and the painting taped onto my drafting table. I also work with my sketch next to me so I know where the shadows and hi-lights need to go. The color comp I leave up on my computer screen to follow.
I paint these like a paint by number. (Did any one else love these as a kid?) First I painted the light grey background. Then, I mix the shadow, base color, and hi-light for a flower. (I typically use gouache to paint all my pieces). Then I start with all the hi-lights of a certain color, than the midtone, then finish with the shadows. After I have done this for all the flowers, I do the white outlines:
As you can see, I paint it color by color until all my guidelines are filled in! It's a very exact way of painting, but it works really well for me. It's also really fun to see the painting come together piece by piece!
The finished painting with the original sketch. Time to take the tape off!
Here is the finished piece:
I loved painting this piece because the colors were so fun! The client was happy, and I believe the bride was too!
If you would like to commission a piece for a wedding, contact me via my etsy store or at anne@anneappert.com.

Also, a reminder that you can now follow me on facebook and on instagram! (anneappertillustration)

Now, back to work on everything else I have to do!

Monday, November 18, 2013

Another Wedding Project

This is another belated post, but while I am working on my calendar, I thought I would get you ready for more flowers. Also, since this project was a gift and I know the person now has it, I feel comfortable blogging about it.
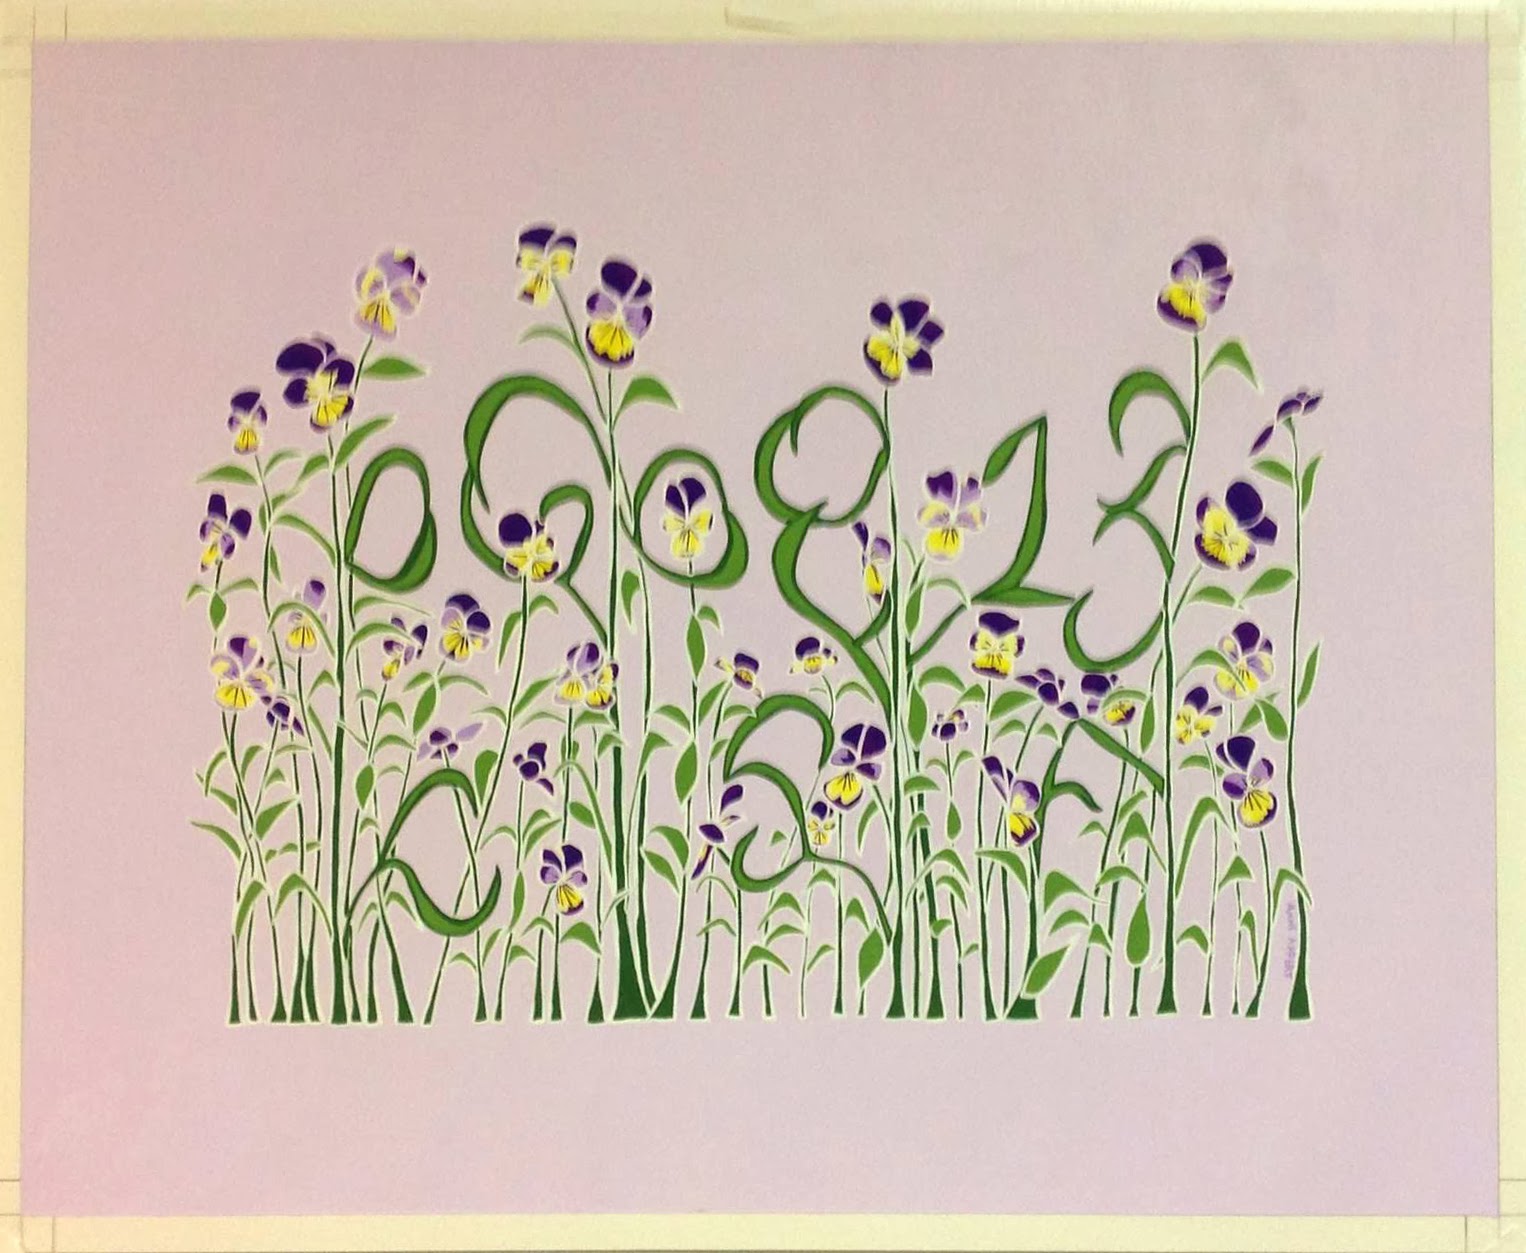
The wedding thing seems to be taking off for me. This summer, I did a project for a friend that also had to do with weddings (on top of all the wedding invitations I made!).  She loved the paintings I did for my 2013 calendar, and asked if I could do a painting for her to give as a wedding present to a friend. Of course I said yes. At first I was just going to do a flower painting for her, but then came up with what I thought was a brilliant idea: I would draw the date of her wedding, with the flowers forming the dates, like a trellis of sorts. My friend loved this idea so I went ahead and sent her some sketches.The bride's favorite flowers are johnny jump ups (or at least this is what I was told) and her bridesmaid dresses were a lovely lilac color, so this formed the basis for the painting.
 This was a much bigger painting then I had done for awhile, so I miscalculated the time it would take me but I was very happy with the result.


The colors!

starting to paint the flowers

it was a slow process

halfway there!

flowers are done!
stems done
numbers and letters done, now just the leaves
now to outline everything

finished! time to take the tape off

the finished painting (the colors are a little bit more accurate in the other pictures.)

The leaves make up their wedding date and their monogram.
Although a pain in the neck at times (and I do mean that literally, I must hold my head in the same position for a long time when I paint),  this was a good project, and another that I hope to put on my etsy store for people to see and order their own versions. (I am currently working on a similar project which I hope to post in the next couple of weeks) I thought this was such a nice way to remember such a beautiful and important day!
And now, back to feverishly painting my calendar!